Monday, April 23, 2012

Owl Nursery Valance Curtain Tutorial

Owl Nursery Valance Curtain Tutorial

The retro owl fabric was the inspiration for Emma's owl themed nursery. But it was actually a bit more tricky than I expected to incorporate it into the room. I used it to make a quilt and a trash can liner/wetbag. And here is one more way: a window valance.

Step 1) Decide on the length and width of the fabric (both the brown and the owl)

Step 2) Hem all four sides of your fabric (both brown and owl)

Step 3) Create fabric loops for hanging. Cut 8-10 strips 2.5" x 7" (both brown and owl) and hem the long sides.

You'll want more loops if you are covering a wider window than mine and potentially less if your window is smaller than mine.

Step 4) Line up the top of both fabrics and decide where your loops will go. Pin in place and sew a hem to attach. I staggered mine so that it's brown loop, owl loop, brown loop, etc.

Step 5) Hang and enjoy!


Pin It

Saturday, April 21, 2012

Spring Throw Pillow

Spring Throw Pillow


This was one of my first home decor sewing projects ever. How far I've come. My friend Kari helped empower me to do this one. Thanks Kari! May the happy pillow inspire you to create things for your own home at a fraction of the cost!

Pin It

Friday, April 20, 2012

Owl Nursing Cover

Owl Nursing Cover


My friend Amy (from MrAndMrsPear.blogspot.com) helped me make a nursing cover. It obviously didn't have to match Emma's owl themed nursery, but owls make me happy so I appliqued an owl onto the corner using scraps and fusible backing and then hand-stitched around the owl to keep it secure. I even bought boning from JoAnn to put in the top to keep the neckline nice and upright when in use. Only had to buy the boning and D-rings, so this sweet thing only cost me about $5. Excellent...

Pin It

Thursday, April 19, 2012

Emma's Owl Themed Nursery

Emma's Owl Themed Nursery

With the help of my friend Kari (karicorsi.blogspot.com) I was able to make the crib bumpers, skirt, quilt and pillow for my baby girl Emma's owl themed nursery. Take a look!

I recovered the glider that my sister Jenny gave me. The fabric reminded me of owl's eyes.

Above is a sweet little pillow I made out of scraps for the glider. The back fabric is pink minky.

Above is the quilt (doesn't serve much purpose yet but it will someday). It is signed "All my love, Mama".

The crib skirt

The bumpers

And here it is all put together:


My sweet friend Kari is willing to take orders if you want customized bedding like I did. You can check her out here.

The reason I'm posting this now is because my cousin Cara has asked me to make the bedding for HER little bundle of joy, due to arrive in June. Don't know the gender yet so I'll be sewing up a storm when s/he makes her debut! Exciting!

Pin It

Wednesday, April 18, 2012

Dumpster Finds!

Dumpster Finds!


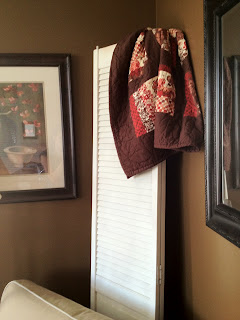
I recently realized that it is quite special to live in such a densely populated area of the US (Chicago). More than that, to live near the UIC campus means that there is an almost constant influx of people coming and going which means for me lots of dumpster finds! I don't go crazy and drive the alleys (although some days I am tempted), I just keep an eye out for furniture on my morning walks. Today I found TWO fun pieces: a white bi-fold door and a white shabby chic desk. Score! I have no place to put the desk at present so it is in the garage but it would make a great sewing table or future desk for my baby Emma. Some days I love Chicago and this is one of them.

Now all this bi-fold door needs is some photos on there!

Wednesday, April 11, 2012

Emma's Alphabet Picture Book

Emma's Alphabet Picture Book
This project took a day to complete and it cost $9 to print the photos at Walgreens and purchase the little booklet from Target. So fun to look back over the last 6 months worth of photos and pick out the ones I wanted to use. Some of the letters are tricky to incoorporate, but we made it work (for example,"x" stands for "extra diapers"). I edited all my photos with picnik.com to add the text. However, picnik is about to close its site on April 19, so you'll have to hurry if you want to use that free program to edit your pics. Here's a glimpse of the photos before I filed them into the album.


Pin It

Thursday, April 5, 2012

Pillowcase Dress Tutorial (from an actual pillowcase)

Pin It

I have long admired the concept of pillowcase dresses, but I recently discovered that not all "pillowcase dress tutorials" are made from actual pillowcases. Instead they refer to the style of dress. Not here--this precious summer dress was made from a pillowcase I found at Salvation Army for (drum roll please)...69 cents!! Throw in some ribbon that was given to me on a baby gift and you have yourself a dress for under one dollar! Holy thrifting, batman!

I mostly followed this tutorial. But here's the gist of what I did.

You'll need:
1 pillowcase
Scissors
Sewing machine
Ruler
Ribbon (I just dug to find some, but you'll need about 84" for both border and neckline)

Step 1) Decide how long you want your dress to be. Mine (for my 6 month old) is seventeen inches long. You don't have to worry about width since we'll be using the width of the pillowcase.

Step 2) Measure 17" up from the hemmed (open) end of the pillowcase and cut off the top (the sewed edge). You should now have two rectangles that are hemmed on one end and attached by the sides.

Step 3) Cut your arm holes. Fold your fabric in half lengthwise so that when you cut your arm holes they will be identical on both sides. They should be shaped like a "J". I made mine 1.5" wide (into the fabric) and 3" long. They could stand to be a bit bigger, but it works because you can adjust the neckline via your ribbon.

Step 4) Hem your arm holes by folding in 1/4" and sewing a seam.

Step 5) Hem your neckline. Fold over 1/4" and sew. Then fold again over 1" and sew, creating a casing.

Step 6) Dig in your gift wrapping supplies and find some ribbon. Attach a safety pin to one end and use that to help guide it through the casing. You can create a bow on both shoulders by using two pieces of ribbon (one for each side) or you can do like I did and use one long piece that ties on just one shoulder (very classy).

Step 7) Seal the edges of the ribbon so that they don't fray by holding them near an open flame (candle or gas stove). It melts the edge so that it seals.

Step 7) Use the same ribbon from up top to create a little border by sewing it around the bottom edge of your dress. I just turned over the very end and sewed it so that the end wouldn't fray.

DONE! Honestly, it took me about 30 minutes to make. I used the leftover fabric to make a pillowcase style shirt and it took me about 5 minutes! Note to self: keep your eyes peeled for cheap cute pillowcases at thrift stores! Great first time sewing project! Cutest $1 dress EVER! Doesn't it just shout Easter?!

Pin It

Wednesday, April 4, 2012

Thrift Store Find...


How fun is this owl bank I found at Salvation Army for $3?! PERFECT for Emma's owl themed nursery. Major score!

Pin It

First of the month chores...


If I don't do certain chores consistently, I forget when the last time was that I did them. For instance, washing my sheets, washing our towels and flipping my mattress is not usually on the forefront of my mind. My solution is to do them around the first of every month. That way I always know when they were last done AND I get the benefit of jumping into a fresh, crisp bed every four weeks (that's the best part, isn't it?!). What tips to you have for staying on top of chores?

Pin It